Have you ever dreamt of transforming your weathered deck from a faded eyesore to a vibrant outdoor haven? A fresh coat of stain can work wonders, but achieving a flawless and long-lasting finish requires proper preparation. The secret weapon in your deck-revitalization arsenal? Pressure washing (power washing). This powerful cleaning method removes dirt, grime, mold, and mildew, revealing the natural beauty of the wood grain. However, there’s a crucial step often overlooked in the excitement of staining: drying time. Skipping this crucial step and applying stain to a wet deck is a recipe for disaster.
Related Article: Pressure Washing Before Painting Your Home: A Comprehensive Guide
In this blog post, we will explore how long to let wood dry after pressure washing for staining, explore the factors affecting drying time, and unveil the secrets to a successful staining project.
The Importance of Proper Drying Before Staining or Sealing
Staining a wet deck is like painting a damp wall. The trapped moisture prevents the stain from adhering properly, leading to a string of problems:
- Peeling and Blistering: The trapped moisture creates a breeding ground for separation between the stain and the wood, resulting in unsightly peeling and blistering.
- Uneven Finish: A wet deck absorbs stain inconsistently. Areas with higher moisture content will absorb more stain, creating a blotchy and uneven finish that detracts from the overall look.
- Mold and Mildew Growth: Moisture trapped beneath the stain fosters the growth of mold and mildew, not only compromising aesthetics but potentially posing health risks.
You can lay the perfect foundation for a perfect and long-lasting stain application that will improve your deck for years to come by allowing for the wood to dry completely.
Understanding the Drying Process and Factors Affecting It
The drying process for pressure-washed wood is influenced by several factors:
Wood Type
Denser hardwoods like oak or mahogany generally dry slower than softer woods like pine. This is due to their varying densities and moisture absorption rates.
Weather Conditions
- Temperature: Warmer temperatures promote faster evaporation of moisture from the wood surface. Aim for days with temperatures in the 70°F (21°C) range or higher.
- Humidity: Lower humidity allows for moisture to evaporate more readily. Avoid staining on humid days, as the moisture in the air will hinder drying.
- Direct Sunlight: Sunlight accelerates drying by directly heating the wood surface. If possible, schedule your pressure washing and staining for a sunny day with low humidity.
- Rain: Even a light drizzle can significantly extend drying time. Avoid pressure washing or staining if rain is forecasted in the next couple of days.
Amount of Water Used During Pressure Washing
Using a high-pressure setting or spending extended time on specific areas will saturate the wood more, requiring a longer drying time.
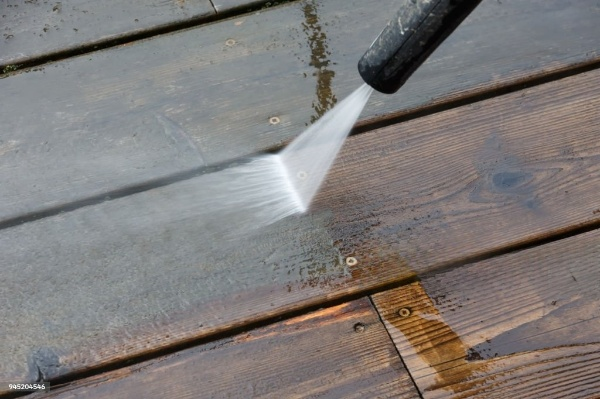
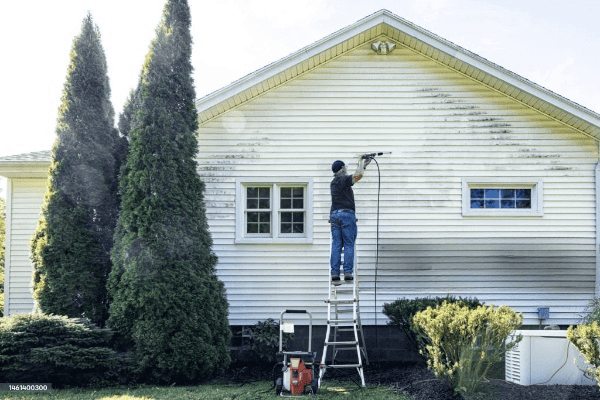
Preparation and Pressure Washing
Before unleashing the stain, proper deck preparation is essential. Here’s a step-by-step guide on safely pressure washing your deck:
- Gather Your Supplies: You’ll need a pressure washer with a low-pressure nozzle, safety glasses, gloves, closed-toe shoes, a tarp, deck cleaner (optional), and a garden hose with a spray nozzle.
- Protect Your Surroundings: Cover nearby plants and furniture with a tarp to prevent overspray damage.
- Attach the Low-Pressure Nozzle: Always use the appropriate nozzle for the job. A high-pressure setting can damage wood fibers.
- Start at the Top and Work Down: Begin by pressure washing vertical surfaces like railings and posts. Then, move on to the horizontal deck surface, maintaining a consistent distance between the nozzle and the wood.
- Clean with a Deck Cleaner: If your deck has stubborn dirt or stains, apply a deck cleaner following the manufacturer’s instructions. Rinse thoroughly with clean water.
- Rinse and Inspect: Thoroughly rinse the entire deck surface with clean water to remove any cleaning solution residue. Inspect for any missed areas and re-wash as needed.
Tips for Avoiding Damage to Wood
- Maintain a Safe Distance: Hold the nozzle at a distance of 12-18 inches from the wood surface to avoid gouging or damaging the wood fibers.
- Use a Sweeping Motion: Move the nozzle in a sweeping motion to avoid concentrating the water flow on any one area.
- Start with a Low Pressure Setting: Begin with the lowest pressure setting that effectively removes dirt and grime.
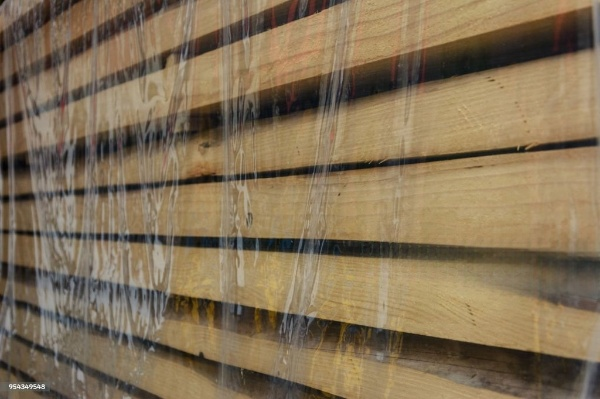
Ensure There Are No Water Puddles or Residues: Importance of Removing Excess Water
Leaving puddles or water residue on the deck after pressure washing can significantly extend drying time and create uneven stain absorption. Here’s how to ensure your deck is clear of water:
- Tilt the Deck Slightly (if possible): If your deck has a slight slope, gravity will assist in draining water runoff. For flat decks, use a squeegee or push broom to remove any standing water.
- Allow Air Circulation: Improve air circulation around the deck to promote faster drying. Remove any furniture or planters that might obstruct airflow.
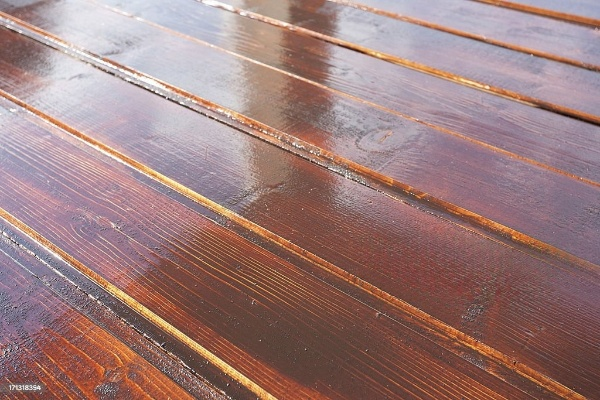
Drying Time and Conditions
While there’s no one-size-fits-all answer, as a general rule of thumb, aim for at least 48 hours of drying time after pressure washing before staining. This assumes ideal conditions: warm temperatures (70°F+), low humidity, and good air circulation. However, several factors can influence the actual drying time:
Wood Type
As mentioned earlier, denser hardwoods like oak take longer to dry compared to softer woods like pine. Here’s a quick reference:
- Fast Drying: Cedar, redwood, pressure-treated lumber
- Moderate Drying: Pine, fir, spruce
- Slow Drying: Oak, mahogany, ipe
Weather Conditions
- Direct Sunlight: Direct sunlight significantly accelerates drying.
- Temperature: Warmer temperatures promote faster drying, while colder temperatures slow down the evaporation process.
- Humidity: Lower humidity allows for faster moisture evaporation from the wood surface. Avoid staining on humid days.
Amount of Water Used During Pressure Washing
Using a high-pressure setting or spending extended time on specific areas will saturate the wood more, requiring a longer drying time.
How Long To Wait After Pressure Washing To Stain A Deck: Specific Considerations
Beyond the 48-hour general guideline, consider these factors when determining the ideal waiting time before staining:
- Wood Type: Refer to the drying reference above. Denser hardwoods might require an extra day or two of drying time compared to softer woods.
- Weather Conditions: If you’re facing high humidity or cooler temperatures, extend the drying time beyond 48 hours. Aim for dry weather with good air circulation and ideally, some direct sunlight.
Risks Associated with Premature Staining
The consequences of staining a wet deck are far from aesthetic. Here’s what you risk by rushing the process:
- Peeling and Blistering: Trapped moisture creates separation between the stain and the wood, leading to unsightly peeling and blistering of the stain later.
- Uneven Finish: Wet wood absorbs stain inconsistently, resulting in a blotchy and uneven appearance.
- Mold and Mildew Growth: Moisture trapped beneath the stain creates a breeding ground for mold and mildew growth.
- Reduced Stain Effectiveness: The stain won’t penetrate properly into wet wood, compromising its ability to protect the wood from UV rays and weather damage.
Factors Affecting Drying Time: A Deeper Dive
When planning a pressure washing and staining project, understanding the factors that determine drying time is critical for getting the best results. Several factors can influence how quickly a surface dries, so that your project runs smoothly and efficiently.
Amount of Direct Sunlight
Direct sunlight acts as a natural drying agent by heating the wood surface and promoting faster moisture evaporation. If possible, schedule your pressure washing and staining project for a sunny day with low humidity.
Weather Conditions (Temperature, Humidity)
- Temperature: Warmer temperatures promote faster drying. Ideally, wait for a day with temperatures in the 70°F (21°C) range or higher. Colder temperatures slow down the evaporation process.
- Humidity: Low humidity allows for moisture to evaporate more readily from the wood surface. Avoid staining on humid days, as the moisture in the air will hinder drying.
How to Handle Less-Than-Ideal Weather Conditions
If faced with less-than-ideal weather conditions, consider these strategies:
- Wait for a Break in the Weather: If rain is imminent, postpone the project until drier weather arrives.
- Improve Air Circulation: Use fans or open nearby windows to improve air circulation around the deck, promoting faster drying.
- Consider Using a Dehumidifier: In high-humidity situations, a dehumidifier can help remove moisture from the air and accelerate the drying process.
Ensuring Wood is Dry: How To Know The Deck Is Completely Dry And Ready For Sealing
Patience is key, but how can you be certain your deck is truly dry and ready for stain? Here are some reliable methods to check for complete dryness:
Visual Inspection
Carefully examine the entire deck for any visible signs of moisture. Look for puddles, damp spots, or a darkened wood surface compared to dry areas.
- The Fingernail Test: This simple test is a quick way to check for surface moisture. Press your fingernail firmly onto a clean, inconspicuous area of the wood surface. If no indentation or moisture mark remains after you lift your fingernail, the surface is likely dry. However, this test might not be foolproof for deeper moisture levels.
- The Moisture Meter (Optional): For the most precise measurement, invest in a moisture meter. This handy tool measures the percentage of moisture content within the wood. Ideally, the moisture content should be below 15% before staining. A moisture meter is particularly helpful for uneven surfaces or decks made from denser hardwoods that tend to dry slower.
Staining and Sealing
Once you’ve confirmed your deck is completely dry, it’s time to unleash your inner artist! But before you grab that can of stain, here are some key considerations:
Choosing the Right Stain
Not all stains are created equal. Consider factors like the type of wood, desired color and finish (solid, semi-transparent), and weather conditions in your area.
- Solid Stains: These provide complete color coverage and are ideal for hiding imperfections or completely changing the deck’s appearance.
- Semi-Transparent Stains: These enhance the natural wood grain while adding a touch of color. They are a good choice for decks in good condition.
Deck Cleaner and Brightener
For decks with stubborn stains or weathered wood, consider using a deck cleaner and brightener before staining. These products help remove surface dirt and prepare the wood for better stain absorption.
Reading the Label
Always carefully read the manufacturer’s instructions on the stain can. This includes recommended application techniques, drying times between coats, and safety precautions.
Preparation is Key
Before staining, ensure the deck is free of dust, dirt, and debris. Sweep the surface thoroughly and remove any furniture or planters that might be in the way.
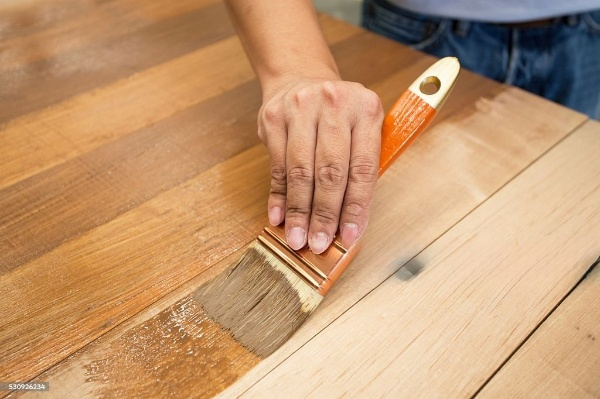
Applying the Stain
Use a high-quality stain brush for even application. Apply the stain in smooth, even strokes following the wood grain. Avoid applying too much stain, as this can lead to dripping and uneven color.
Two Coats are Better Than One
For optimal color saturation and protection, apply a second coat of stain after the first coat has dried completely (refer to the manufacturer’s recommended drying time).
What Will Happen if I Try to Apply Stain to a Wet Deck? The Pitfalls of Skipping Drying Time
As tempting as it might be to skip the drying time, staining a wet deck is a recipe for disaster. Here’s what you can expect:
- Peeling and Blistering: The trapped moisture creates separation between the stain and the wood, leading to unsightly peeling and blistering of the stain later.
- Uneven Finish: Wet wood absorbs stain inconsistently, resulting in a blotchy and uneven appearance. Areas with higher moisture content will absorb more stain, creating a splotchy look.
- Mold and Mildew Growth: Moisture trapped beneath the stain creates a breeding ground for mold and mildew growth.
- Reduced Stain Effectiveness: The stain won’t penetrate properly into wet wood, compromising its ability to protect the wood from UV rays and weather damage. The stain may also appear lighter in color than expected.
Transforming your weathered deck requires patience and proper preparation. By prioritizing drying time after pressure washing and following the steps outlined in this guide, you’ll lay the foundation for a successful staining project.
For more, check out the Pressure Washing Info Hub.
Remember, the extra time spent waiting ensures a beautiful and long-lasting finish that you can enjoy for years to come. Contact ShinePro for any pressure washing services to make sure you get the cleaning you want.
