
If you share your rides with a furry friend, you already know the struggle. The most effective way to remove pet hair from car interiors is to vacuum loose fur first, loosen the hair stuck in upholstery with damp rubber gloves or a rubber brush, vacuum again with the right attachment, and finish with a lint roller for the strands left behind. No matter how much you love your dog or cat, their hair has a way of working itself into every corner of your car’s interior. Car seats, carpets, floor mats, and seat backs seem to collect dog fur and cat hair like a magnet because static cling helps it embed deep in the fabric. At ShinePro, we work with pet owners every single day, and we’ve learned exactly what it takes to remove pet hair from car interiors for good, not just for a few days.
This guide is built for pet owners who regularly travel with dogs or cats and want practical ways to keep a cleaner, more comfortable vehicle. You’ll learn why pet hair is so hard to remove, which tools work best, how to clean different interior surfaces step by step, what mistakes make the job harder, how to prevent buildup, and when it’s worth calling a professional detailer.
Why Pet Hair Is So Hard to Remove From a Car
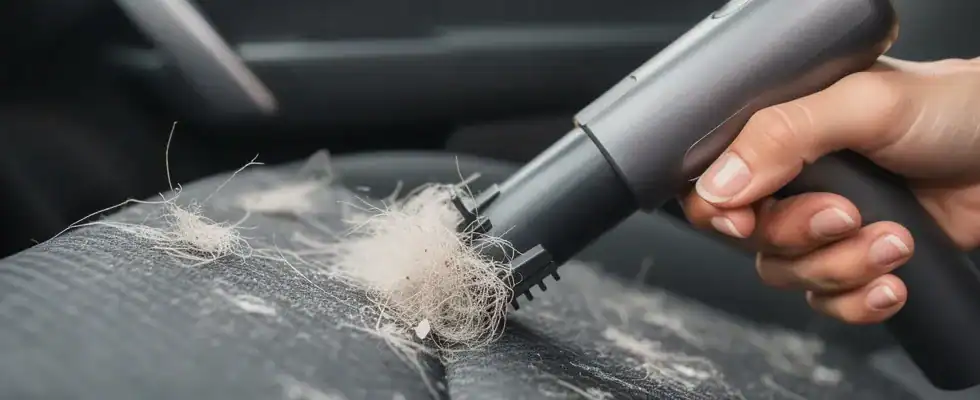
Before we get into the how, let’s talk about the why. Pet hair doesn’t just sit on top of your seat fabric or carpet fibers; it works its way in. Every time your dog jumps in and out, or your cat curls up on the seat, static electricity builds a static bond between the hair and the fibers underneath. That static cling is the main reason a regular vacuum pass never seems to get all the hair.
Short hair from cats and short-haired dog breeds is often the worst offender because it’s thin enough to weave itself deep into carpet fibers and seat fabric. Once it’s embedded, simple suction from a vacuum just isn’t strong enough to pull it loose. That’s why the first rule of pet hair removal is this: you have to loosen embedded hair before you can vacuum it away.
The Best Tools for Pet Hair Removal
Over the years, we’ve tested just about every pet hair remover tool on the market, and a few stand out for actually getting the job done.
Rubber gloves and rubber brushes. This is our go-to method, and for good reason. Damp rubber gloves create friction against seat fabric and carpet without damaging the material. Rub in short strokes, working in one direction, and you’ll see clumps of hair start to roll up almost immediately. A rubber bristle brush works the same way and is especially good on cloth seats and carpets where hair is packed in tight.
Rubber squeegee. A squeegee is one of the most underrated tools for this job. Dragging a squeegee across seat fabric or carpet gathers pet hair into rows that are easy to pick up or vacuum. It’s fast, it’s cheap, and it works on both car seats and floor mats.
Vacuum with the right attachments. A strong vacuum is non-negotiable, but the attachment matters just as much as the suction power. Vacuum attachments like a crevice tool help you reach seat seams, the gap between the seat and console, and other hard-to-reach areas where hair tends to hide. A dedicated pet hair attachment with a rubber or bristle head will outperform a standard nozzle every time.
Lint roller. A lint roller is a great finishing tool. It won’t handle deeply embedded hair on its own, but for a quick touch-up it removes about 70 percent of loose surface hair in seconds. Keep one in your glove box for between-wash maintenance.
Lilly Brush. If you want a tool built specifically for this problem, a Lilly Brush is worth the investment. These brushes are designed to pull hair out of upholstery and carpet fibers in a way that a generic brush tool can’t match, and in our experience they can remove close to 100 percent of embedded pet hair when used correctly.
Chemical Guys Pet Hair Rubber Brush. This is another solid pick, usually priced around $8.99, and it’s a favorite among pet owners who want a reliable, affordable rubber brush option they can keep in the car at all times.
Pumice stone. For truly stubborn dog hair or stubborn fur that won’t budge with a brush alone, a pumice stone can help lift deeply embedded strands from carpet. Use it gently and in short strokes, since it’s more abrasive than rubber tools.
Step-by-Step: How to Remove Pet Hair From Car Interiors
Here’s the process our detailing team follows every time, whether we’re doing a quick refresh or a full deep cleaning.

1. Open the doors and clear everything out. Start by opening doors wide for airflow and pulling out floor mats, seat covers, blankets, and any loose items. Leaving them this way helps the interior ventilate and dry as you work, while cleaning these separately keeps loose hair from spreading back into the vehicle.
2. Vacuum first to remove loose hair. Before you touch a brush or glove, vacuum the entire interior, including carpets, seats, and floor mats. This clears away surface dirt and loose hair so you’re not just pushing debris around later.
3. Loosen embedded hair with a rubber glove or brush. This is the step most people skip, and it’s the reason so much hair gets left behind. Using the rubber glove method, put on a damp rubber glove, or grab a rubber bristle brush, and work the seat fabric and carpet in short strokes, always in one direction. You’ll start to see dog hair and cat hair ball up into visible clumps. Working in one direction breaks the static bond instead of just spreading it around, which means less hair gets pushed deeper into the fibers.
4. Try a diluted fabric softener solution for extra static reduction. Mixing a small amount of fabric softener with water and lightly misting the fabric can reduce static electricity in carpet fibers, making stubborn pet hair release much more easily. Go light with this; a heavy spray can leave fabric damp for too long, so a fine mist is all you need. Always test on a hidden spot first.
5. Gather the hair into piles. Once the rubber glove or squeegee has done its job, you’ll have rows and clumps of hair sitting on top of the fabric. Pick up the larger clumps by hand or with a microfiber towel before vacuuming.
6. Vacuum again with the right attachments. This second vacuum pass is where you actually remove pet hair for good. Use a crevice tool for seams, seat backs, and gaps, and a wider upholstery attachment for open areas of the seat fabric and carpet. Go slow and overlap your passes.
7. Handle hard-to-reach areas. Seat rails, the space between the seat and center console, and door pockets are notorious for trapping hair. A crevice tool or a small brush tool can get into these tight spots where a vacuum alone can’t reach.
8. Wipe down hard surfaces. Dashboards, door panels, and trim can collect fine hair too. A damp microfiber towel picks this up without scattering it into other parts of the cabin.
9. Finish with a lint roller. After vacuuming, run a lint roller over the seat fabric one more time to catch any leftover strands the vacuum missed. A portable pet hair removal tool can also help with quick touch-ups on seats between cleanings. This last pass is what makes the difference between a car that looks clean and a car that’s actually pet hair free.
Tips for Different Surfaces
Not every surface in your car should be treated the same way, and using the wrong tool on the wrong material can cause damage.
Cloth seats and carpets respond best to rubber gloves, rubber brushes, and squeegees. Work with the grain of the fabric first, then go over it again in a slightly different direction if hair is still stubborn.
Leather and vinyl seats should be treated more gently. Skip the pumice stone and stiff brushes here. A soft vacuum brush attachment and a microfiber towel are enough to pull hair out of seams and creases without scratching the surface.
Floor mats should always come out of the vehicle for cleaning. A stiff brush or rubber squeegee works well here since mats can handle more aggressive agitation than seat fabric.
Plastic trim and door panels just need a dry or slightly damp microfiber towel. Avoid pushing hair into vents or switches.
Preventing Dog Hair and Cat Hair From Building Up
Removing pet hair is only half the battle. Preventing dog hair and cat hair buildup in the first place saves you time and keeps your car’s upholstery looking better for longer.
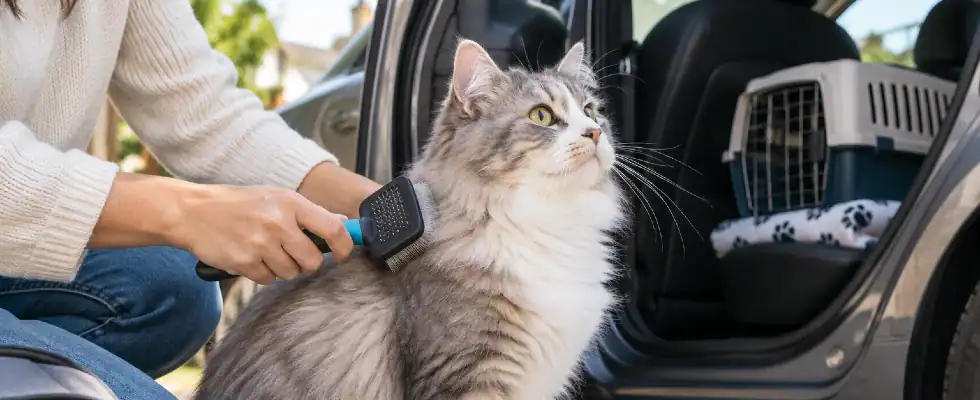
- Brush your pet before car rides. Brushing your dog or cat before they hop in reduces the amount of loose fur they bring with them, which means less hair ends up on your car seats to begin with.
- Use seat covers. A washable seat cover or hammock-style cover can help reduce pet hair buildup on the seats because it catches fur before it reaches the fabric, and you can remove and clean the cover more easily than deep cleaning the seat itself.
- Consider a pet carrier. For smaller pets, a carrier limits how much hair spreads throughout the cabin.
- Train your dog to stay in one area. Restricting your pet to the back seat or cargo area keeps hair concentrated in one zone instead of spread across the whole interior.
- Vacuum regularly. Don’t wait until hair is deeply embedded. A quick vacuum after every trip means far less hair to deal with down the road, and regular grooming combined with regular vacuuming minimizes shedding buildup significantly over time.
Common Mistakes to Avoid
We see these mistakes constantly, so it’s worth calling them out:
- Vacuuming without loosening embedded hair first, which just leaves stubborn pet hair behind.
- Soaking fabric with too much water or fabric softener solution instead of using a light mist.
- Using a pumice stone or stiff brush on leather, vinyl, or delicate trim.
- Skipping seat seams, rails, and other hard-to-reach areas.
- Relying on a lint roller alone for a heavily furred interior. It helps, but it won’t replace a proper deep cleaning.
When It’s Time to Call in the Pros
DIY methods work well for regular maintenance, but sometimes dog hair and cat hair get so deeply embedded that home tools just can’t finish the job. If your car’s interior has years of buildup, persistent odors, or hair packed into areas you simply can’t reach, that’s when professional car detailing makes the difference.
At ShinePro, our team offers car wash and detailing support for pet-hair-heavy interiors, using commercial-grade vacuum attachments, rubber brush tools, and deep cleaning techniques to remove pet hair that home methods leave behind. We know exactly how to work carpet fibers, seat fabric, and upholstery without damaging your interior, and we treat every vehicle like it’s our own. If you’re a pet owner who wants your car clean and fur-free without spending your weekend on it, ShinePro detailing is built for exactly that.
Keep Your Car’s Interior Pet Hair Free

The secret to a truly clean car interior isn’t one magic tool; it’s the right sequence: vacuum first, loosen embedded hair with a rubber glove or brush, vacuum again, and finish with a lint roller for anything left behind. Add in a little prevention, like brushing your pet before rides and using seat covers, and you’ll notice far less hair showing up trip after trip.
If you’d rather leave it to the experts, our detailing team is ready to help.Reach out to ShinePro and let us handle the deep cleaning so you can enjoy the ride with your furry friend, hair-free.


